HOW TO RECREATE MY ABSTRACT ARTWORK

A step by step guide
Whenever I look for artwork in my home I am always on the hunt for minimal, and unique looking pieces. Art collecting is such a fun hobby of mine. I never can really buy anything though, because of the price tag. One day, I’ll be able to invest in real art!
Ps. If you are looking to invest in affordable artwork, here are two emerging artists to check out and support: Brook Taylor Art & SK Hix
In the meantime, I am stuck with my own means of producing artwork. This can be a tricky thing to paint your own artwork. It means you are the client and the artist. Have you heard the saying “design is never done”? Well, I think the same is true for art. No matter what pieces I paint or create, I am always thinking of ways to complete them or to develop them further.
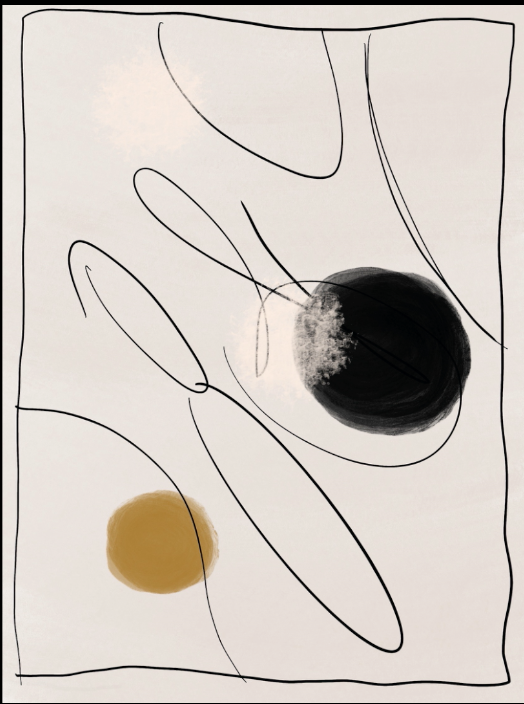
I am actually really happy with how my most recent painting turned out! I am painting this for over our bed. My secret weapon? I was able to mock up the painting on my iPad prior to creating it! This was a huge help. I could actually look at the scale and proportions of everything prior to actually putting paint to canvas. This is probably a big taboo in the art industry. But, hey, it gave me much more confidence when actually painting! I suggest at least sketching something out to any of my “Type A” Followers. This way, you know what to expect!
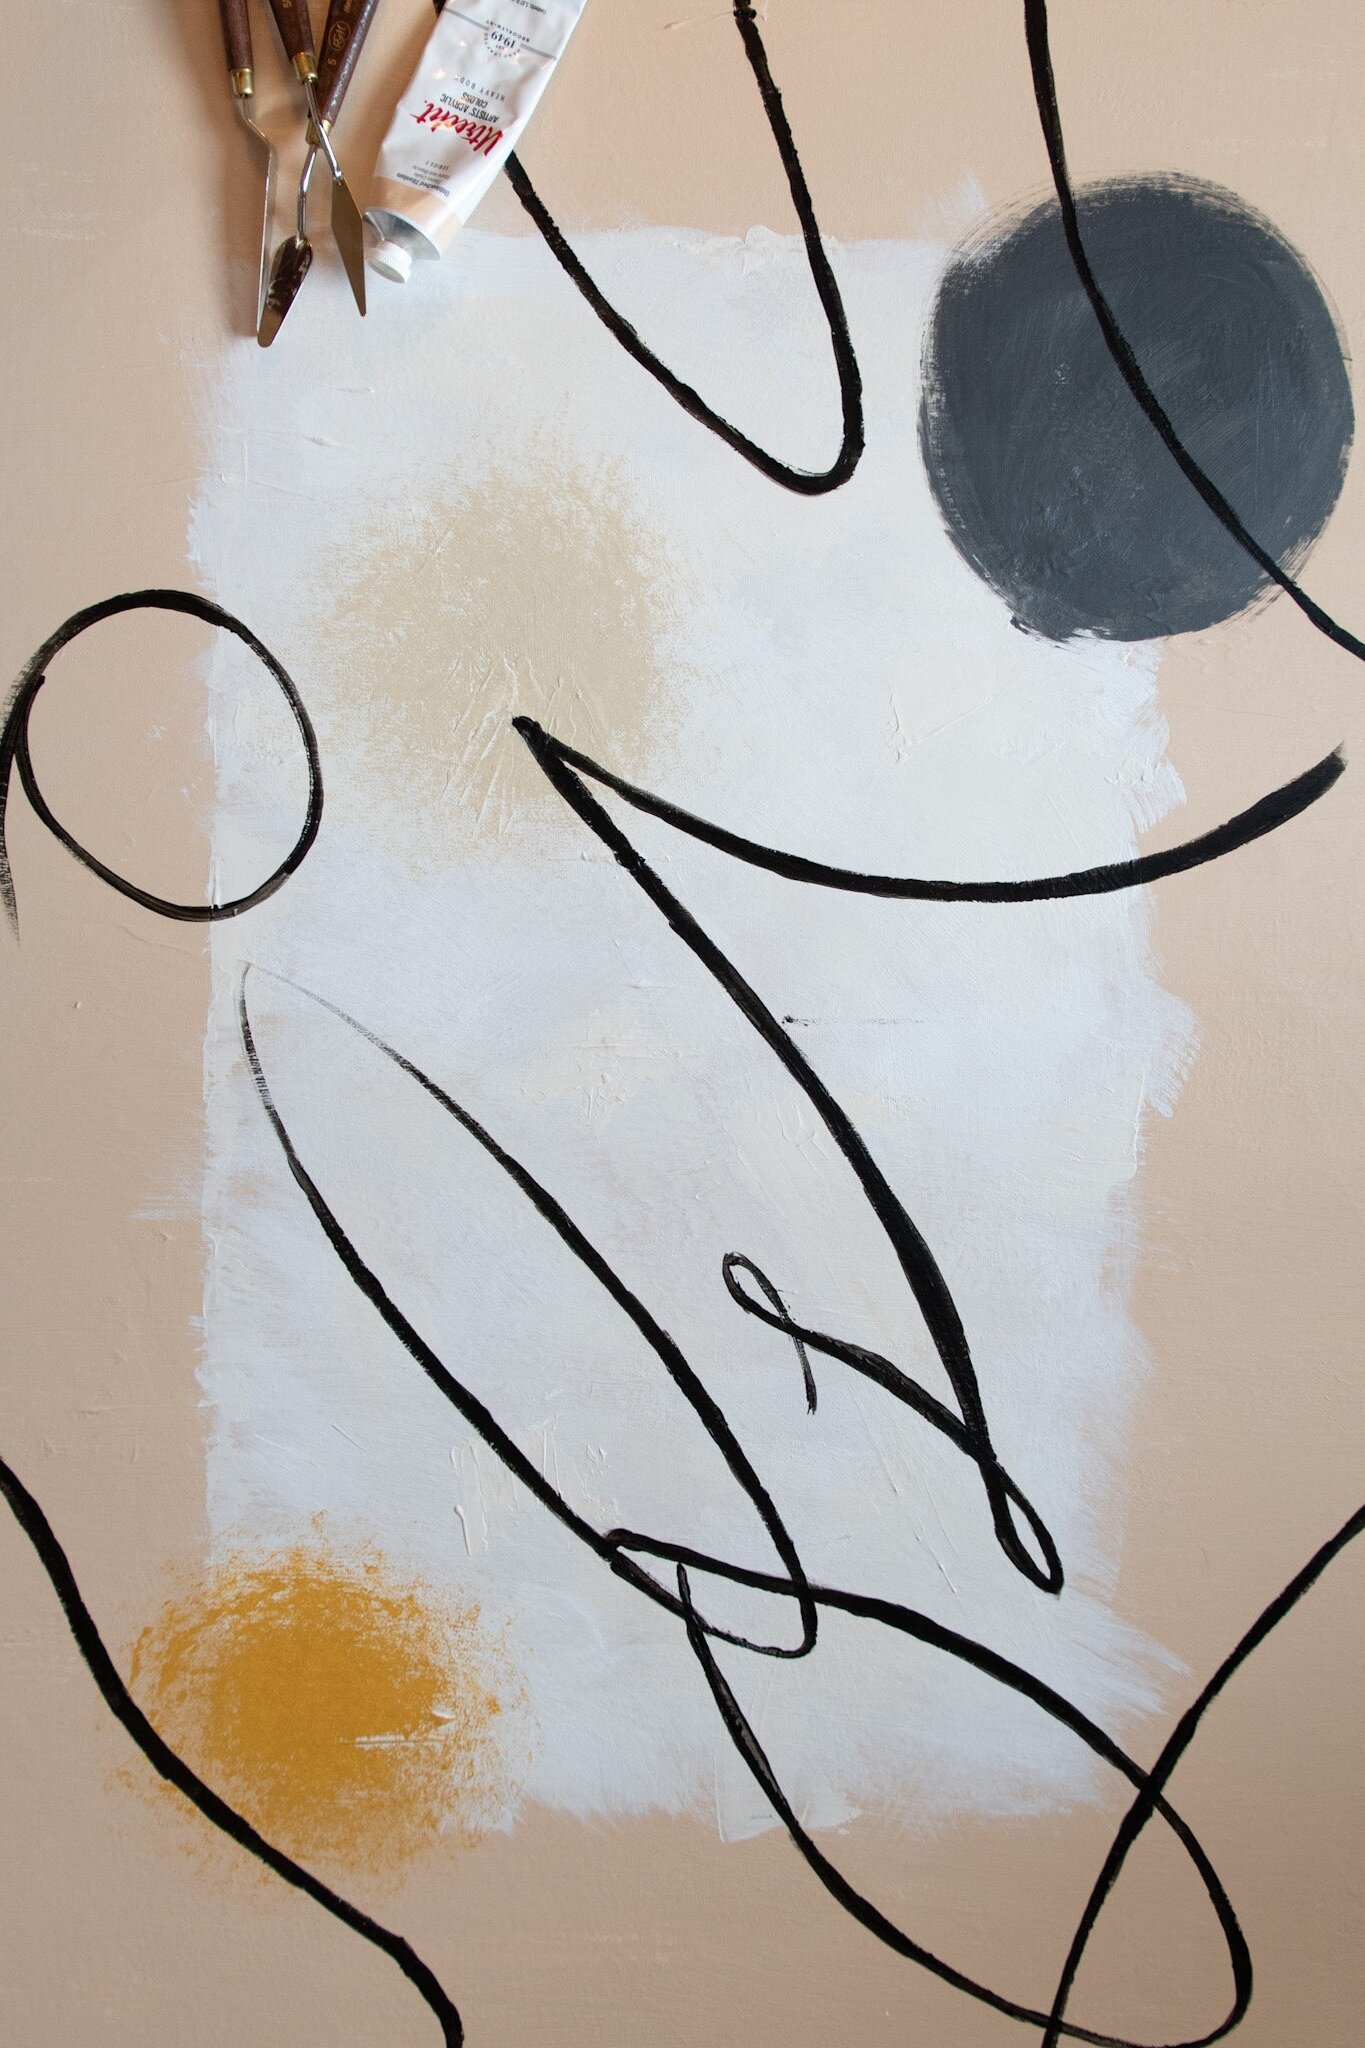
Here is my iPad sketch. It turned out pretty similar right?! I use the app Procreate on my iPad, but you could also test out your sketch with pens and paper. The key with this painting was to highlight the existing chartreuse and mustard tone in our bedroom, and to keep it really textured and layered.
If you want to re create exactly what I did, here is what you’ll need:
Large canvas - we used a 42” x 36” (framed or unframed - see the note below about hacking a framed piece!)
Acrylic Gesso - use this to paint over existing pieces or to give your base layer more texture
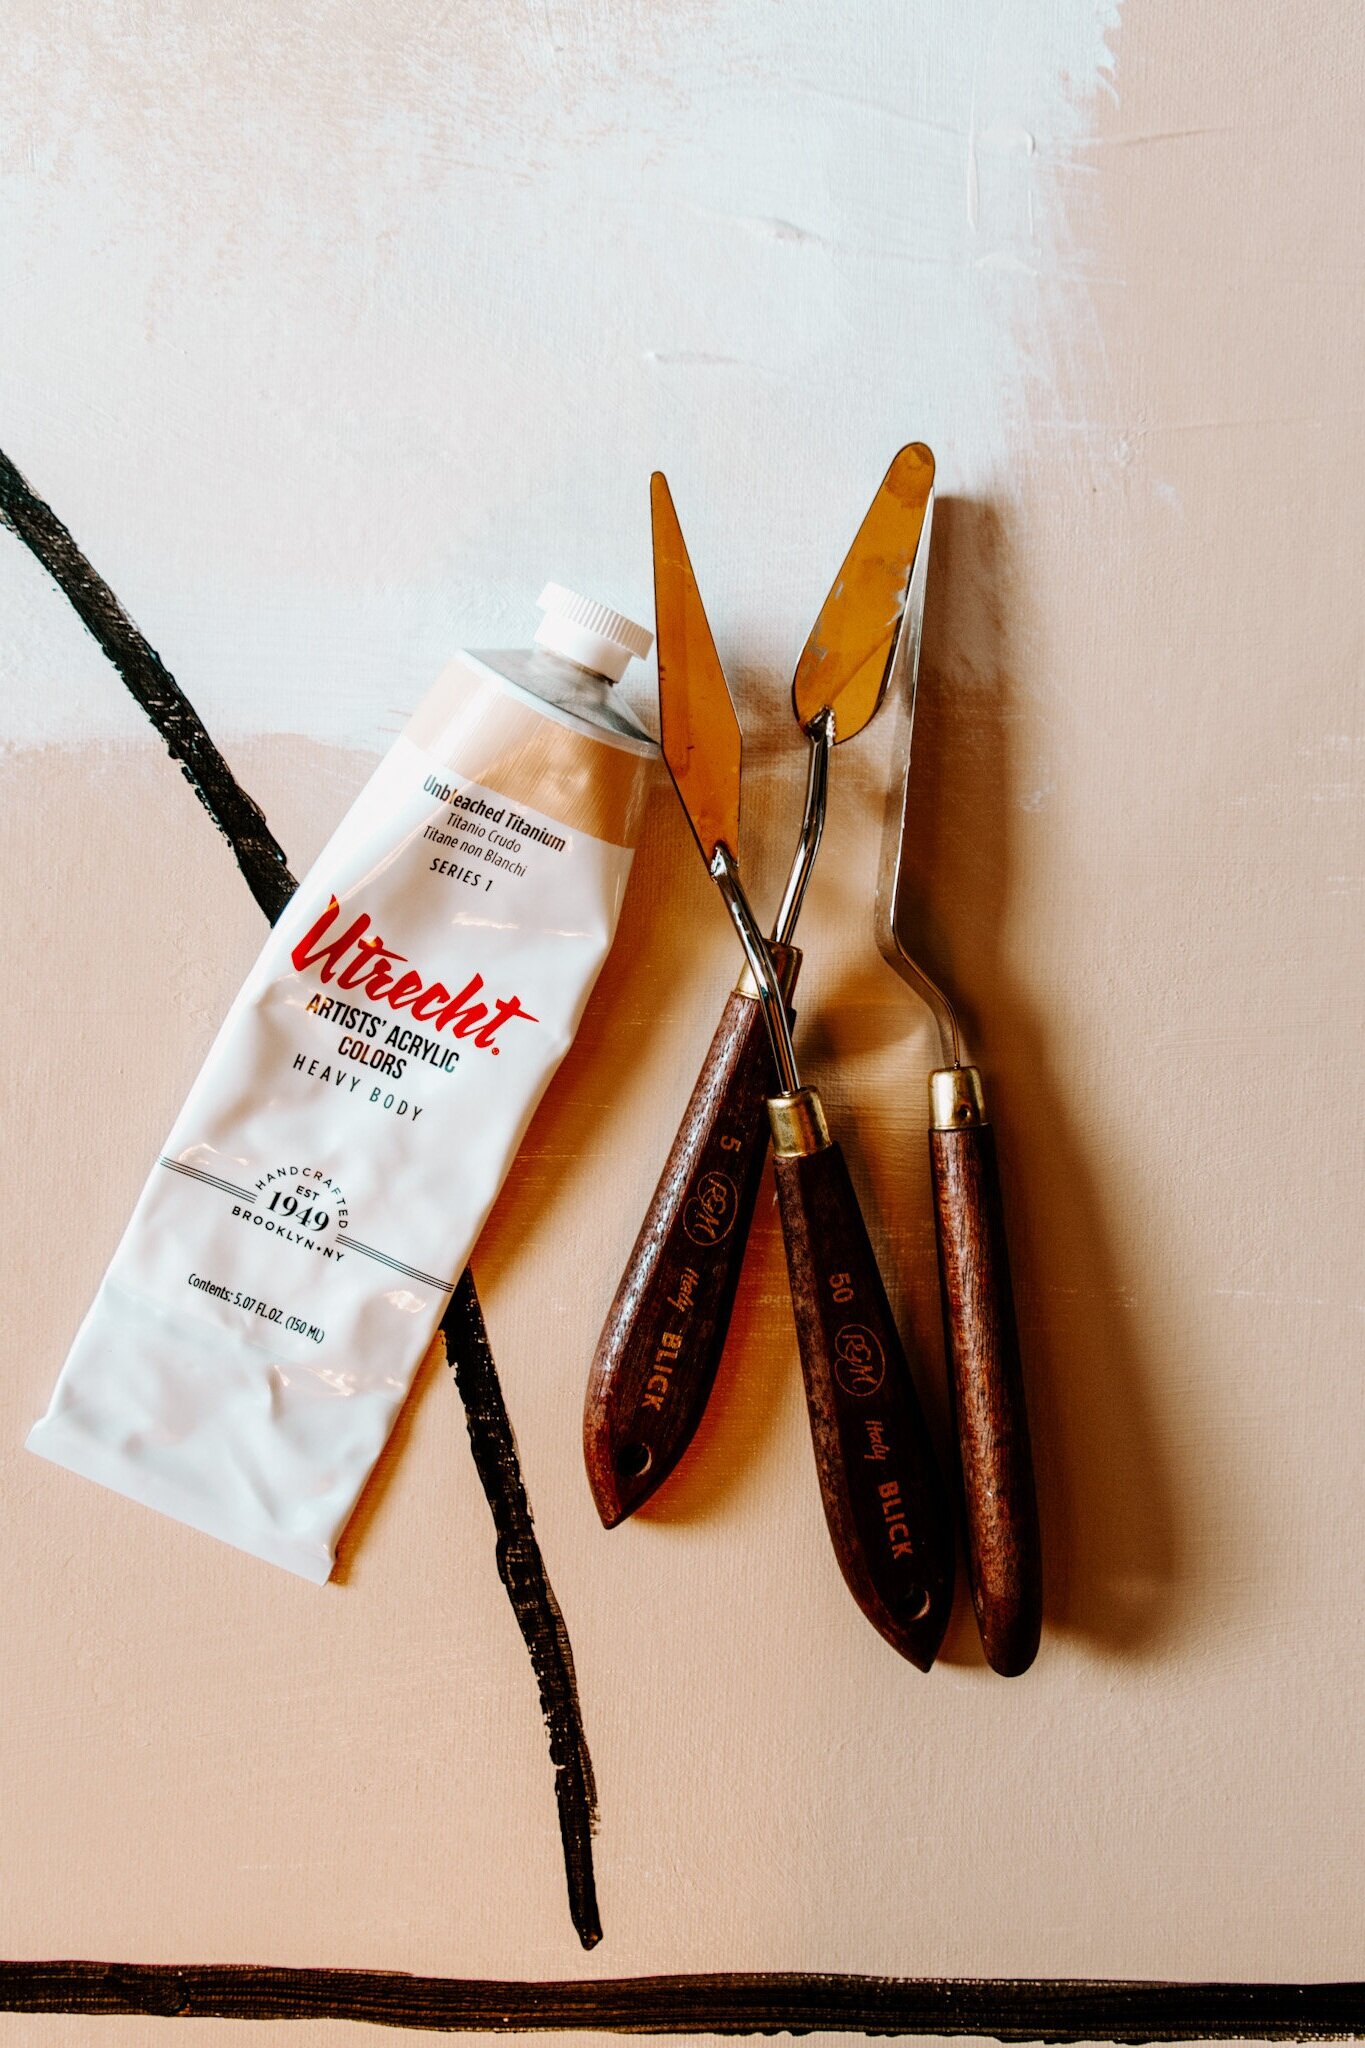
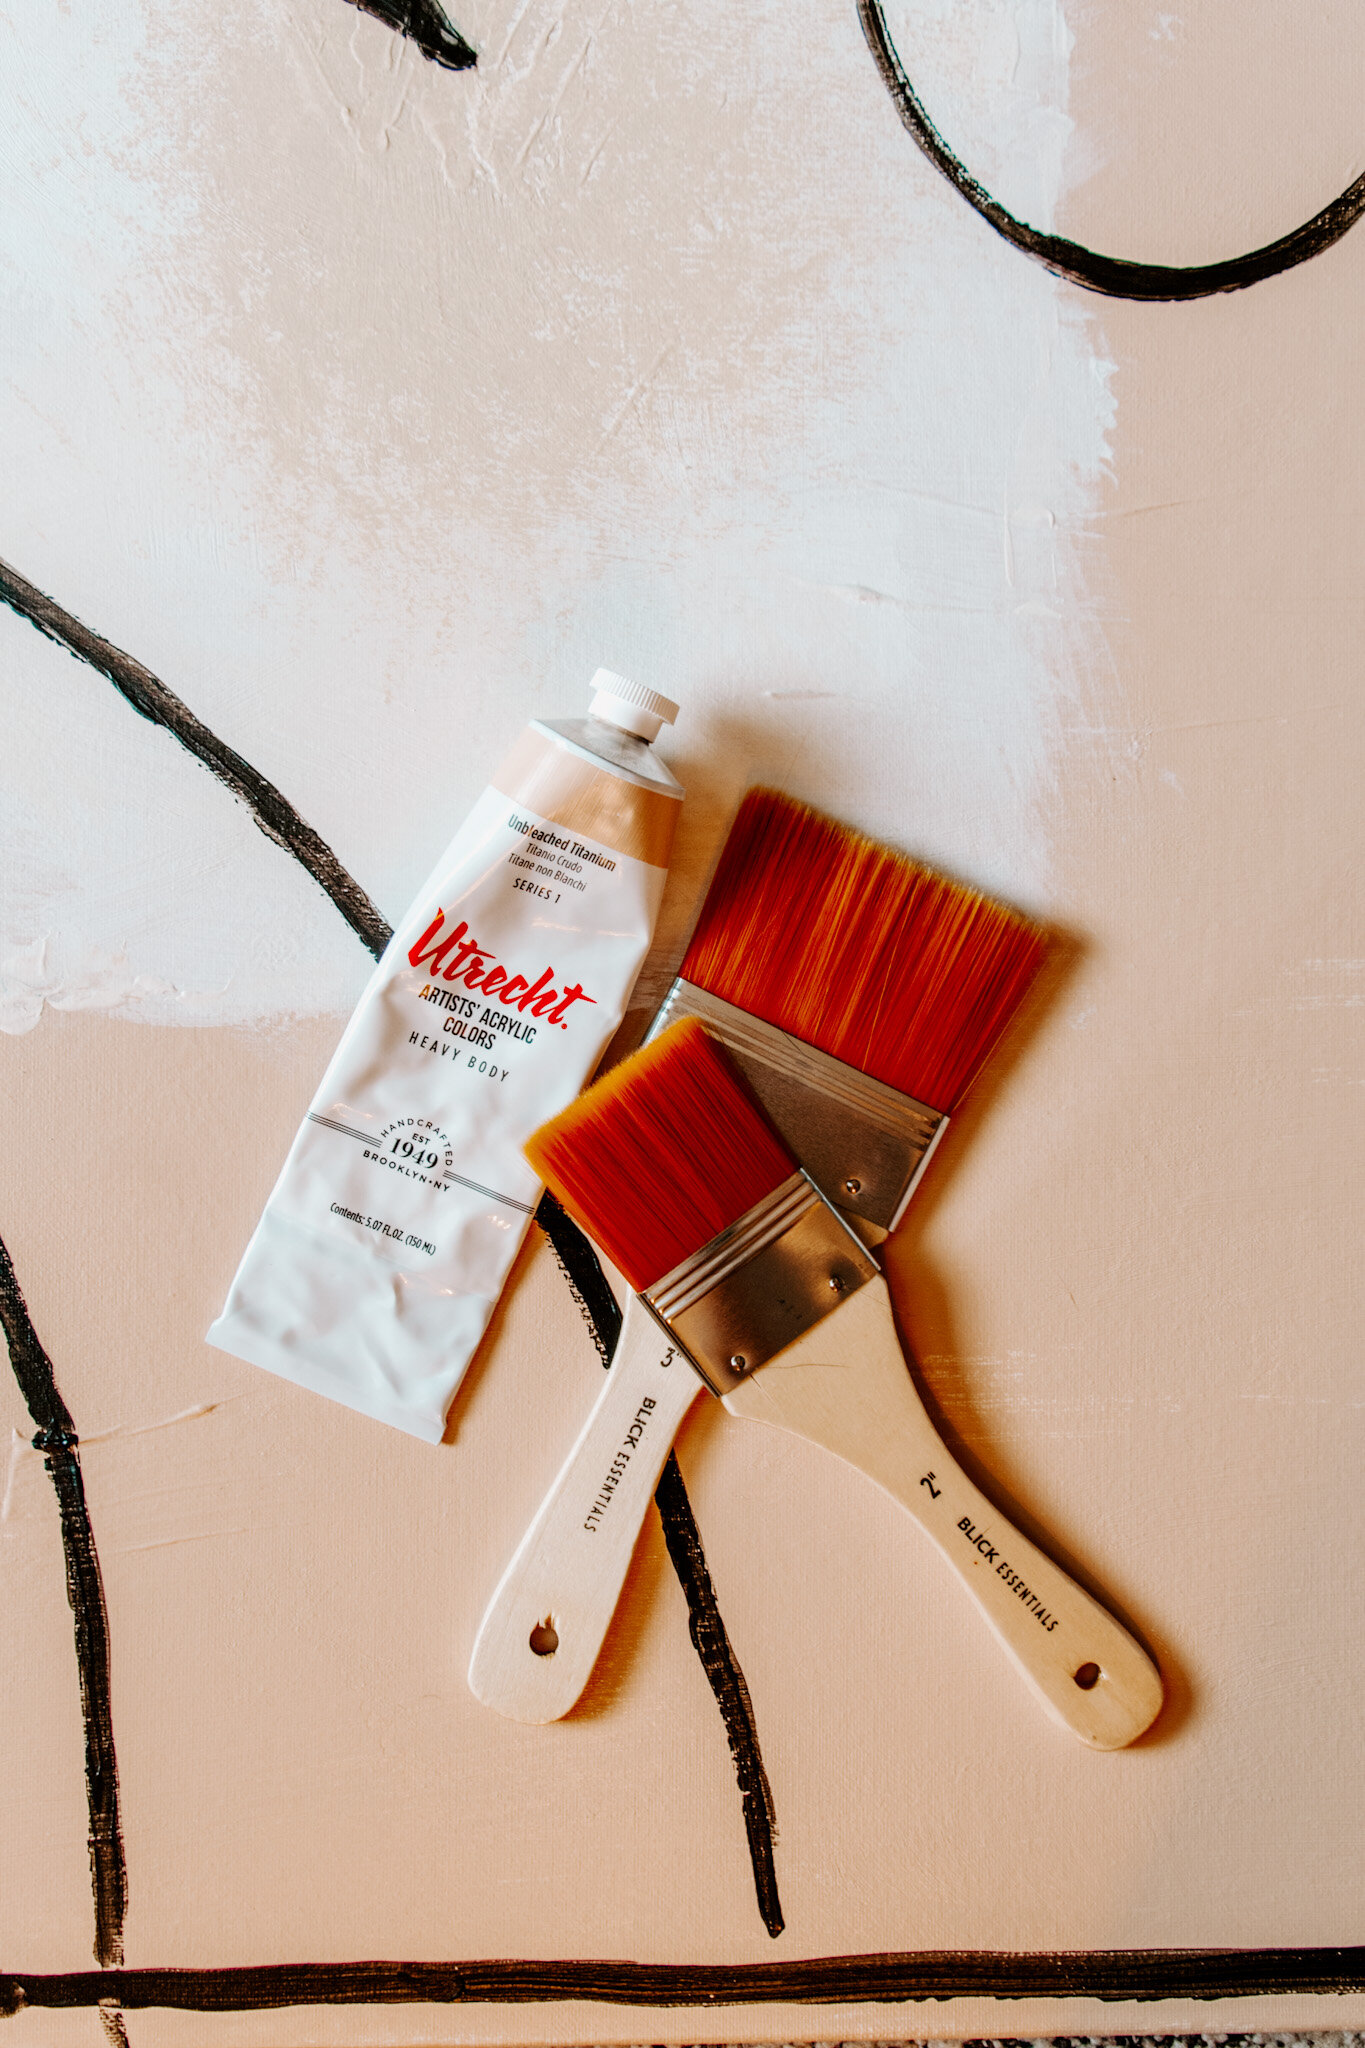
Base Layer Paint - I used Unbleached Titanium from Utrecht
Accent Paint colors - see below for why we used the certain colors!
Wide Brushes - the wider the better!
Golden Extra Heavy Gel Gloss - mix this in with your center section to add a heavier and glossier texture
Paper Towels
Here is how I created this painting:
Step One: the canvas. Make sure you measure to get the right size of canvas for your space. When picking a canvas think about the weight and quality of the canvas. If you are working on a pice that has lots of layers, think of getting a heavier weight canvas to support that. Here is what I got. These are from Amazon and work just great!
Pro tip - you see in the beginning of the video that I am painting over an old piece of art. You can do this too! You don’t have to start with a blank canvas. You can actually work off of an existing framed canvas piece from home goods or target.
Step Two: Paint a base layer of Gesso. This step can be skipped if you are painting on a blank canvas. Although if you are looking to add texture, I recommend sticking to this step. Acrylic Gesso is the perfect base layer to add dimension and texture to any acrylic piece.
Step Three: Paint in large strokes your base color. I used Unbleached titanium by Utrecht here with a 3” wide brush. I wanted the brush strokes to be loose and really textured. I would recommend doing multiple layers too to get the best base color!
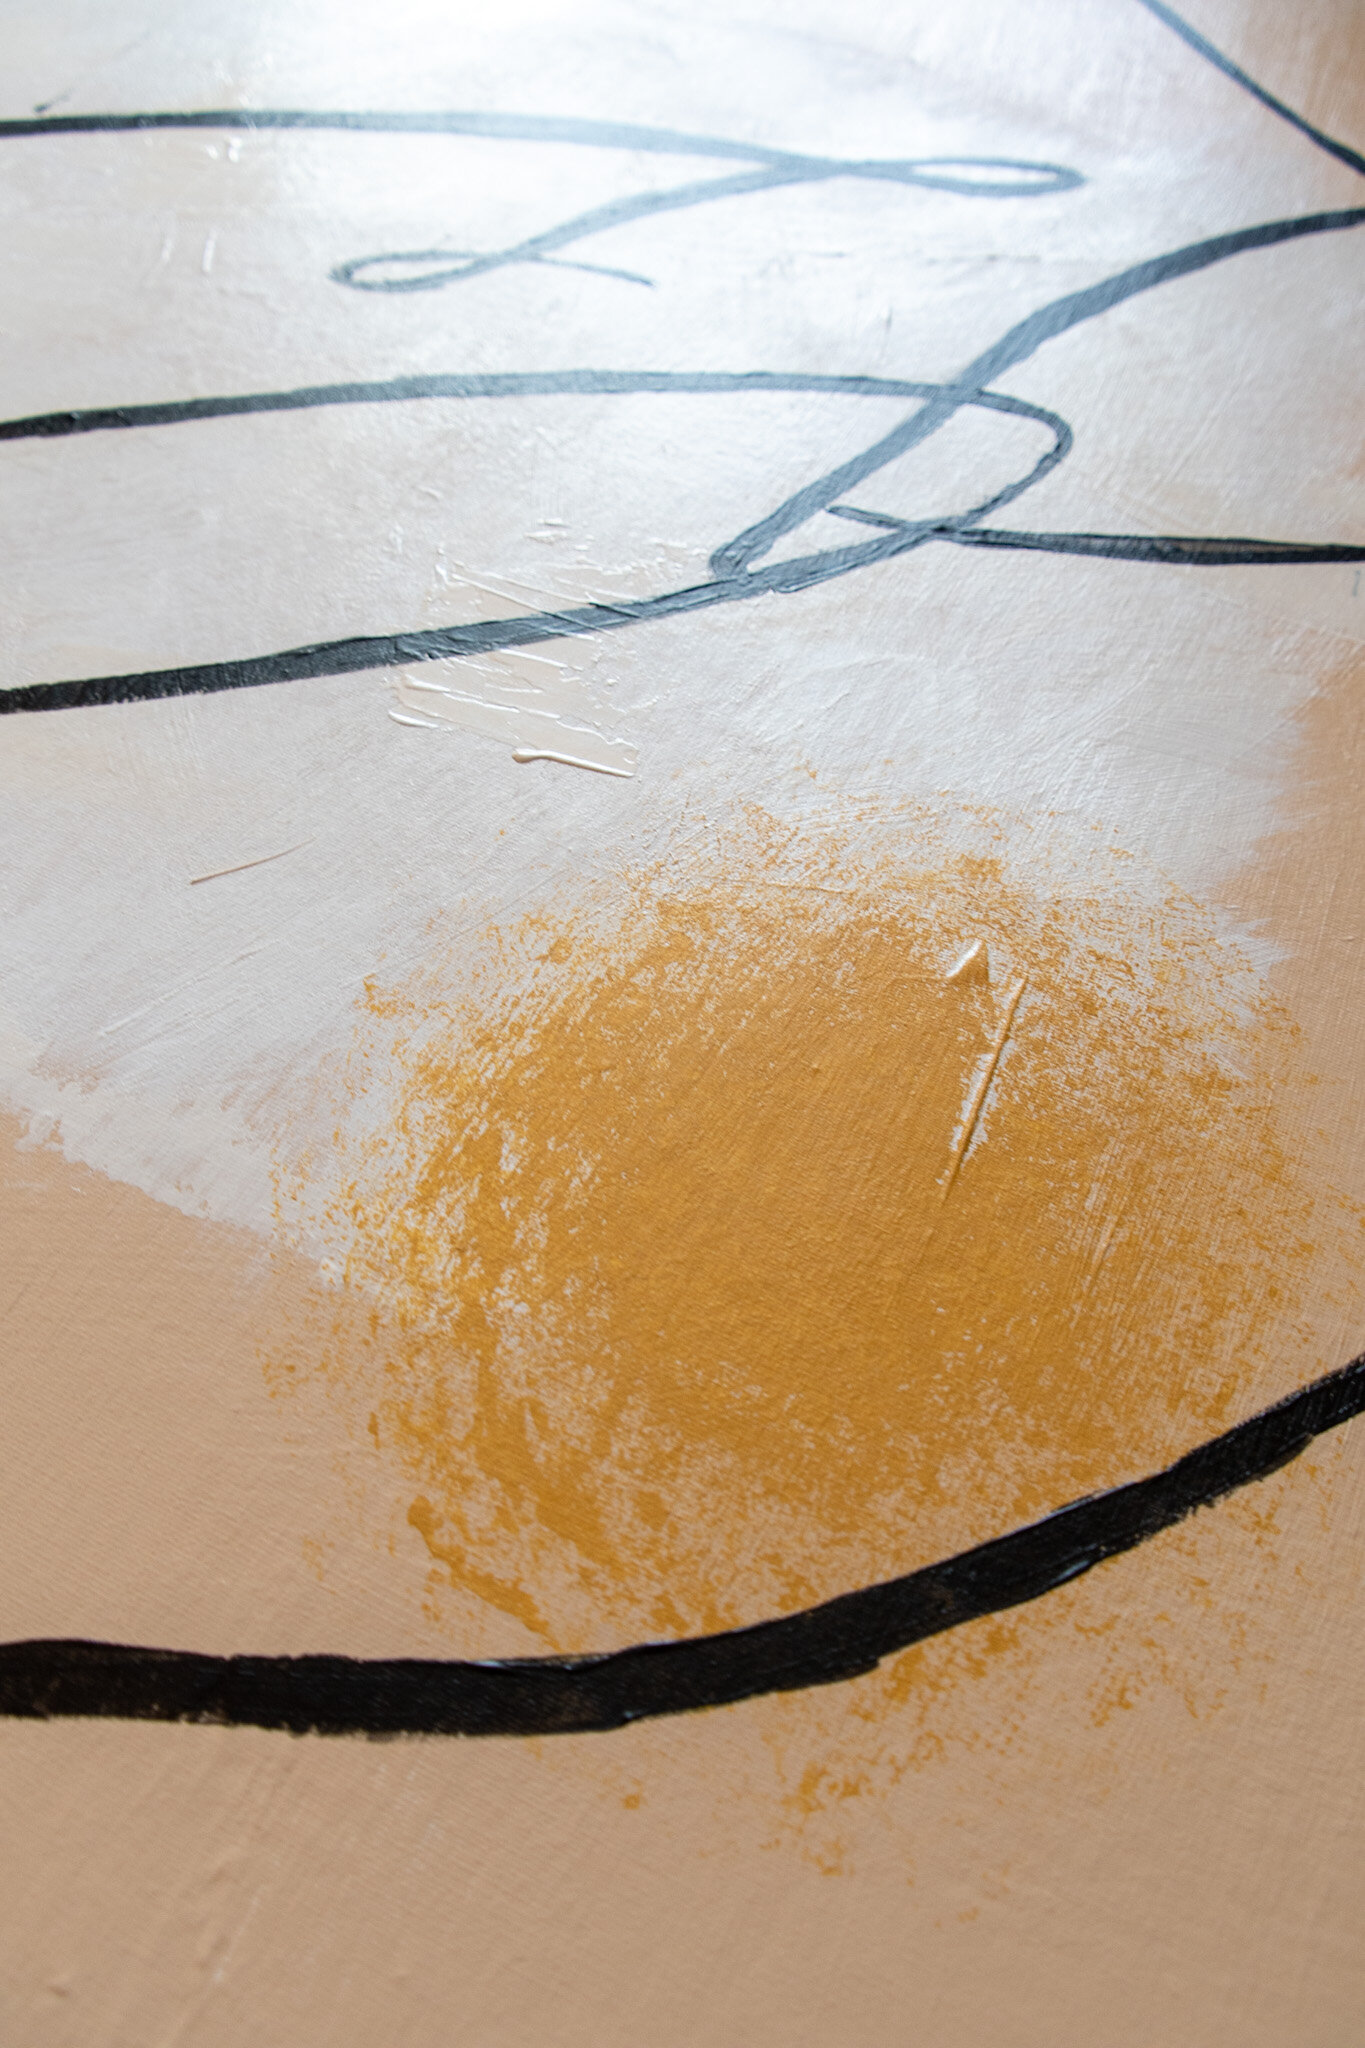
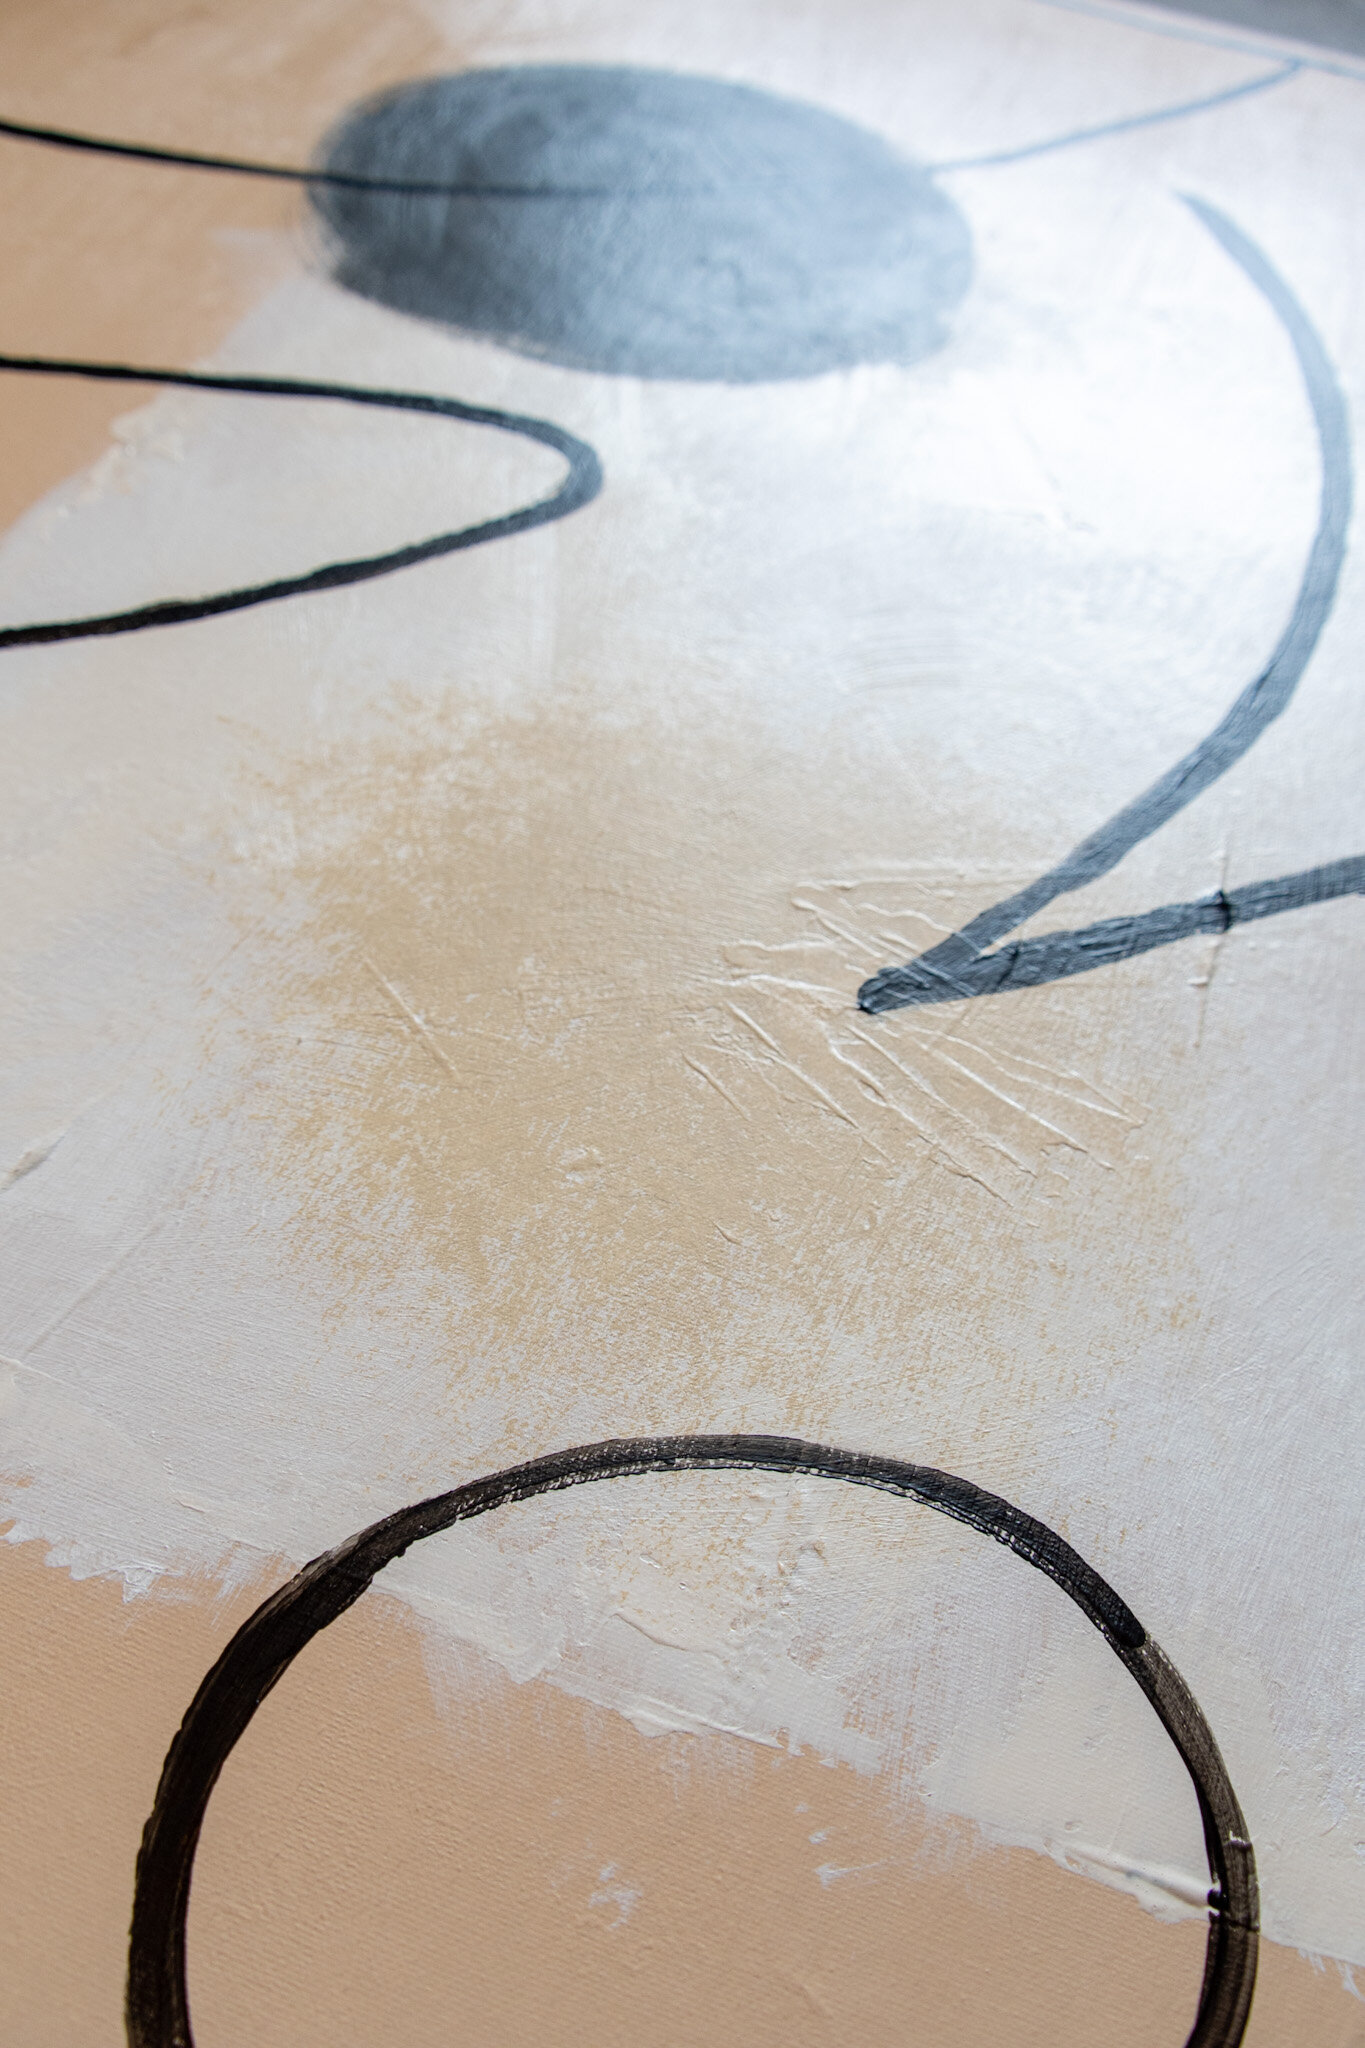
Step 4: Golden extra gloss mixed with white paint in the center. This area I wanted to be really really textured, and almost fade in and out. I had to make sure to not have a really wet paint brush to get the feathered edges.
Step 5: Add your accents of color. The great thing about this painting is that it is soooo simple and versatile. You can change the color palette any way you want and have a completely different look! Here we chose to do a mustard yellow paint and a slightly lightened black circle. I wasn’t too focused on making my circles “perfect”. A little imperfection adds a lot of dimension and visual excitement to a piece!
Step 6: The border. For this step I wanted to play around with application techniques. I knew that I wanted the line to be really thick and highly saturated. Almost like a pen mark. I didn’t want to show any brush strokes here. I started by literally relying on gravity to drop paint on the piece as I went along a straight path. This didn’t really work that well. It ended up being a really uneven line. So, what I ended up doing is just using a TON of paint on my little paint brush. As soon as I felt the actual brush tip hit the canvas I got more paint on the brush.
Step 7: The Sponge technique. Ok, so for this step I actually used a folded up paper towel. You just get the four corners and keep it really loose. Then dab it into the paint and lightly dab it onto your piece! This is a really awesome finishing touch that adds a lot of texture without looking too heavy. This step was super simple. Again, less is more with this step
Now, Just hang it up!
That’s it! Viola! Seriously this piece is really simple to do, and also can be changed and modified in many different ways to fit your personal aesthetic.