THE LAZY GIRL HACK TO A GALLERY WALL - LAYERING PHOTOS

We’ve all been there. You set intentions to do something around your home, start the project, but then move on to something else, subconsciously leaving that project half done. Well that is exactly what happened to me with the photos over my dresser in our bedroom. I had intentions to hang a beautiful tonal gallery wall, aaaand got distracted. How did I leave the photos? Just propped up against the wall on top of my dresser. Well, turns out a month later I’ve decided I love the look of this so much more and decided to style it up, and leave it as so. (Ok I was actually just too lazy to change it…don’t judge!).
Turns out I accidentally made a super chic, and turns out super trendy install of a different style of gallery wall. To see if I could make this install look a little bit more *intentional* I scoured Pinterest to see what all the other chic minimal interior stylists were doing. It turns out - there is almost ZERO method to the madness here. By now, you know that I always want there to be a method to the madness. So, I’m creating one! After studying all of these amazing install shots I found on Pinterest, I have broken it down how to successfully achieve this layered photo look:
WHAT SIZES TO USE
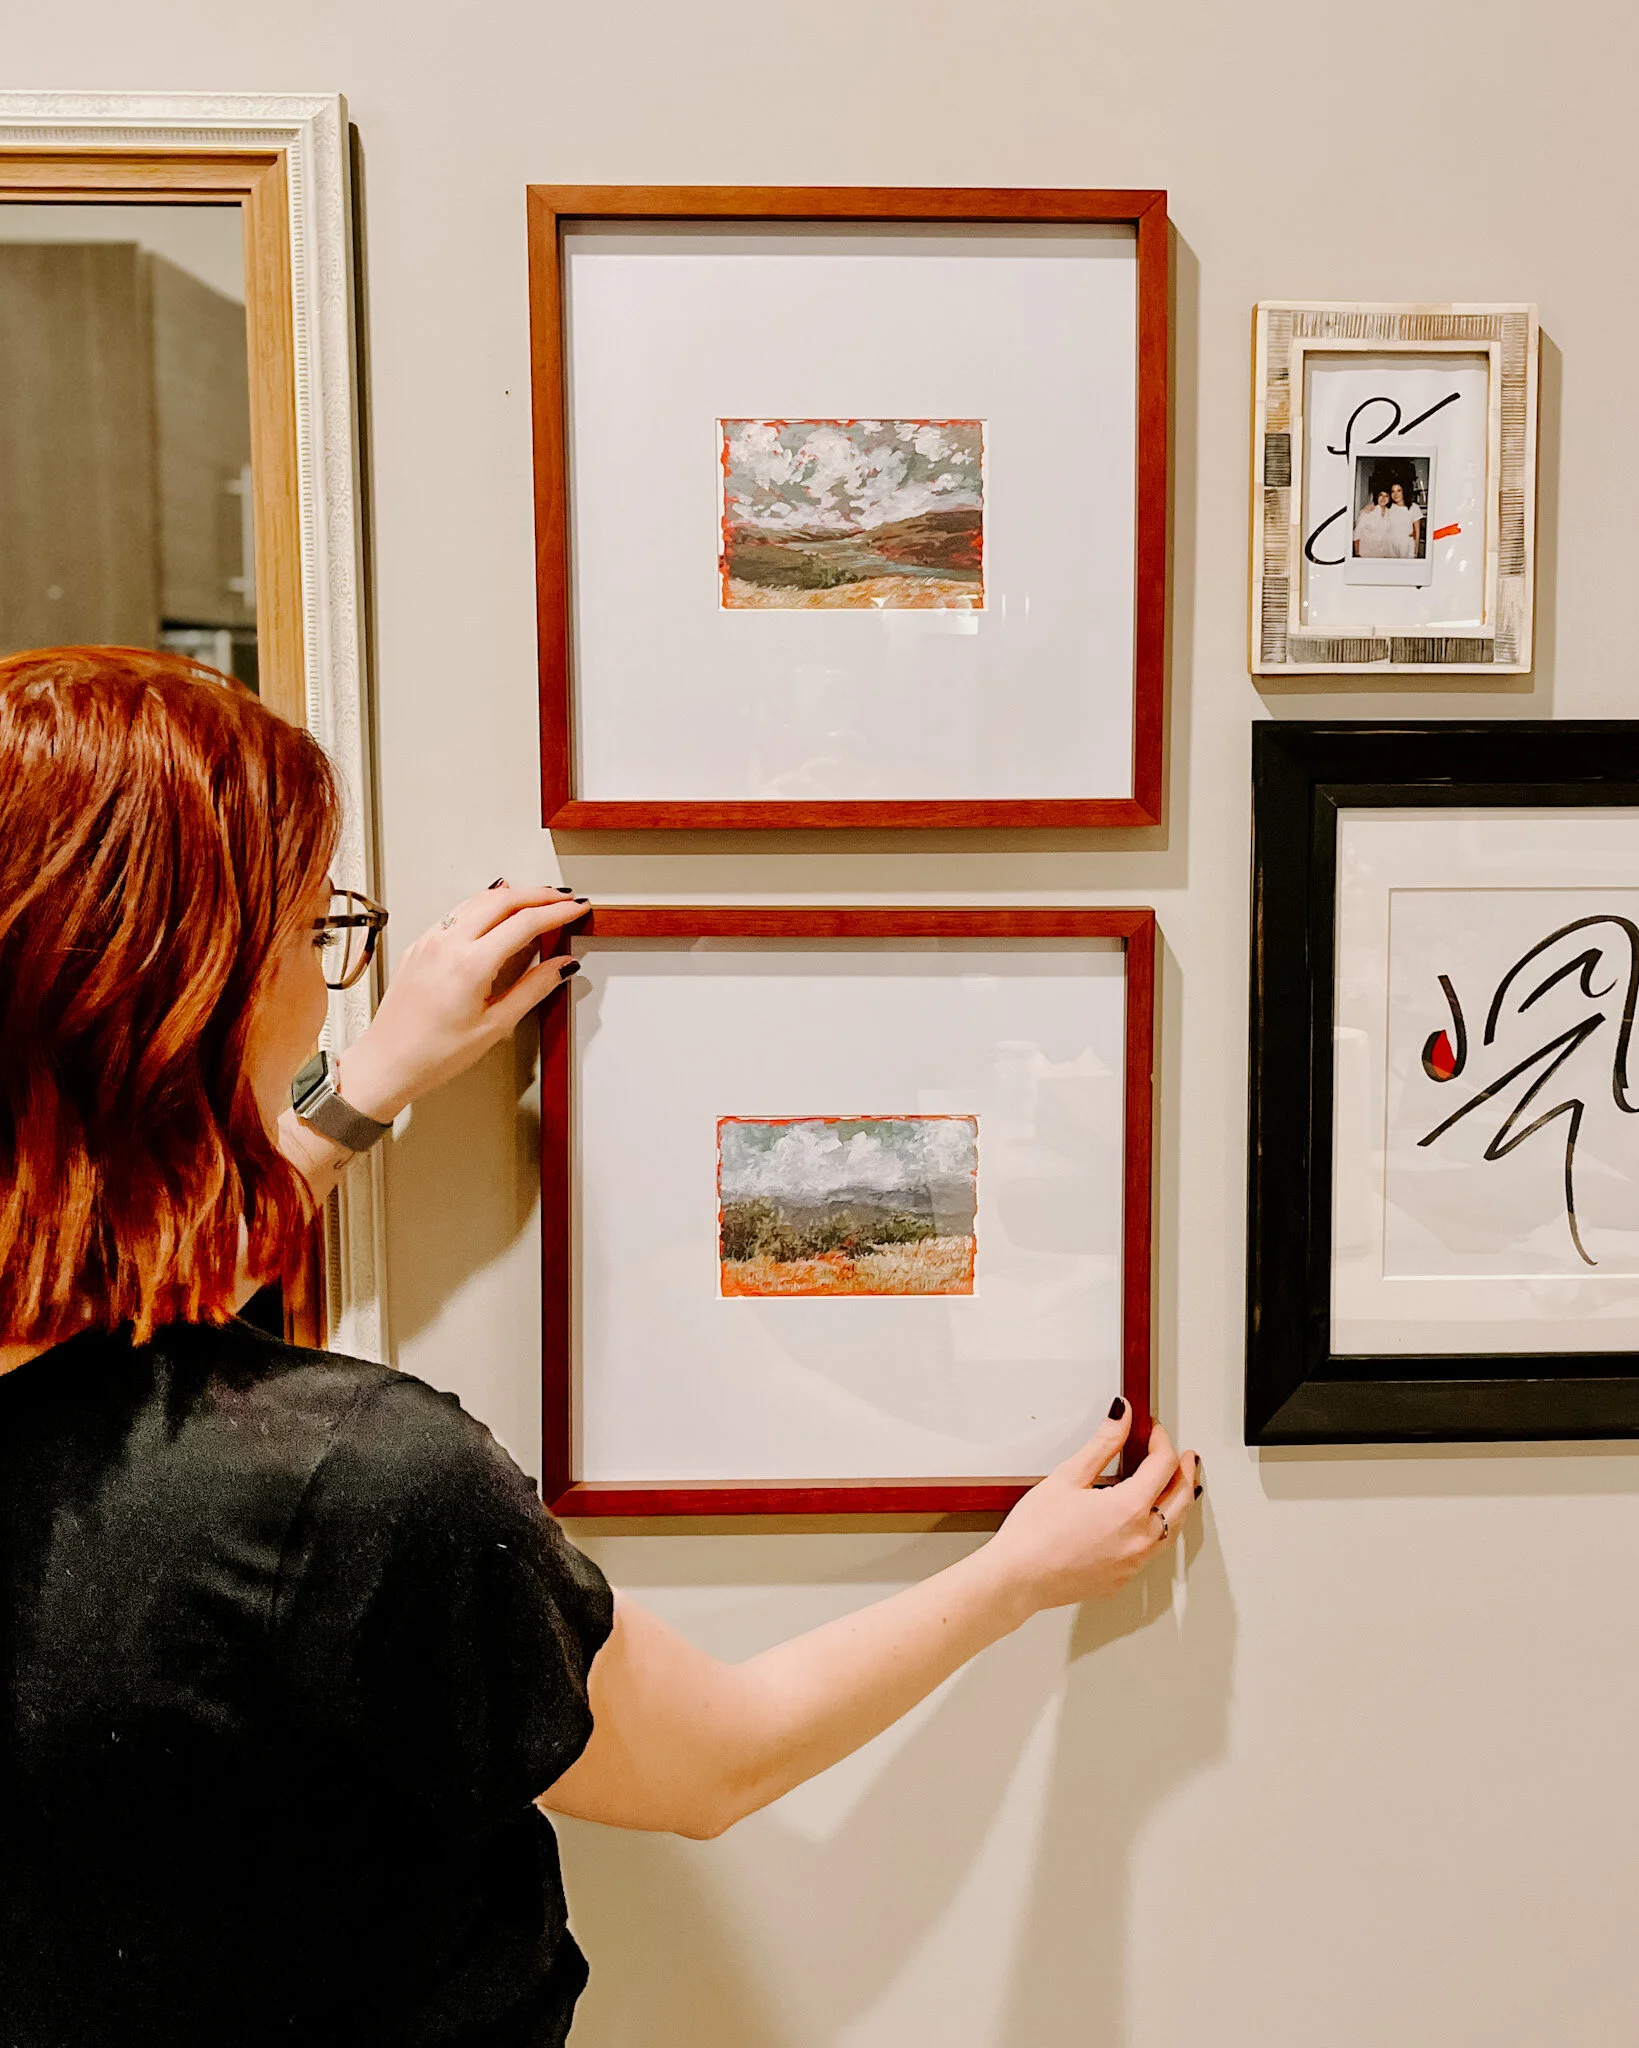
The reason this sort of install is super successful is because the frame sizes, styles, and orientation is all different. You’ll see that in my install all of the frames are different, they are oriented differently, and they are all different sizes. General rule of thumb is that you’ll want 1 or 2 large frames, 2 mediums size frames, and 1 small frame. Want to make sure you nail it? Always have an ODD number of frames. Here are the sizes that I used on our dresser:

WHY THE FRAME STYLE MATTERS
Now that you’ve gotten the size of the pieces down, it’s time to gather pieces with DIFFERENT frame styles. Trust me, you’ll want these to be a little different so the pieces don’t fade together. You’ll see that in my install every frame style is different. I also have a piece that isn’t even framed! I really love how this adds some contrast and depth to the install. I would also suggest that some of your smaller pieces have a more ornate frame. Not only will this help you with your install, but since you put your smaller frames in front you can really appreciate the depth and detail of the frame.


THE TRIANGLE METHOD TO FOLLOW
Ok so we’ve gotten the frame style and the size down. Now for the “install”. I feel silly even calling it an install because you really aren’t doing anything other than propping framed pieces against a wall….but how you do it really matters!
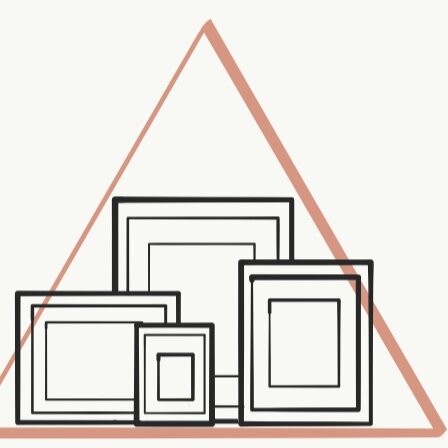
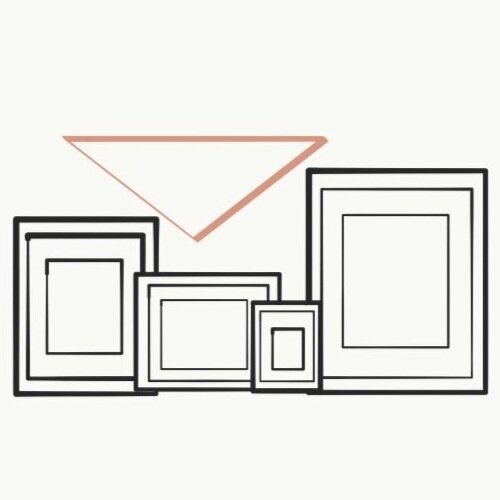
No matter what size frames you have, or how you orient them you’ll always want to create a triangle with your grouping. This can either be a triangle orientation with the frames themselves, or a triangle with the “void” or whitespace the frames create. See what I mean:
Framed Art Looks you can buy right now